
Others
Add a Contact Form to a React App with Netlify Forms
Here’s a great article from SitePoint
In this tutorial, you’ll learn how to add a contact form to a React application with Netlify Forms.
Adding a contact form to a React application might require writing server-side code to handle form submissions, but with Netlify Forms you can take a break from the logic, because it does all that behind-the-scenes work for you when your site is deployed on Netlify.
Prerequisites
To follow along with this tutorial, you should be familiar with React, Git and GitHub. You should also have a Netlify account and have Node installed on your machine. If you need any help getting set up, you can consult our guide on how to install Node using nvm.
What You’ll Learn
By the end of this tutorial, you’ll know how to do the following:
- deploy a React app to Netlify
- integrate Netlify Forms with a stateless form component (a form component that doesn’t use the state)
- integrate Netlify Forms with a stateful form component (a form component that uses the state to handle its data)
The completed guide to this tutorial is available on GitHub.
Introduction to Netlify Forms
Netlify Forms is a feature of Netlify for managing and handling form submissions without having to write any server-side code. By adding a simple attribute to your HTML form tag, you can get up and running with Netlify Forms. Forms can also be submitted asynchronously with JavaScript, making it a great companion to sites powered by Vue, React, and other modern frameworks.
Netlify Forms Pricing
Netlify Forms is free to get started with, but there’s a limit of 100 form submissions per website per month on the free plan, and also some features like background functions and role-based access control are excluded while using the free tier.
To exceed the form submission limit or make the excluded features available, you’ll have to upgrade to a different plan. You can do that on the Netlify pricing page.
Creating a Form for Netlify Forms
Netlify Forms can be integrated with both a stateless form (a form that doesn’t use the state to handle its data) and stateful one (a form that uses the state to handle its data). In this tutorial, we’ll firstly create a stateless form to demonstrate how we can integrate Netlify Forms with it. But later on, we’ll refactor the stateless form into a stateful one, in which we’ll also integrate with Neltify Forms.
Let’s start by creating and setting up a new React app.
Create and set up React
Type the following command in your terminal to create a new React app:
$ npx create-react-app netlify_forms_app
Here our app’s name is netlify_forms_app, but you can give it any name you wish as long as it’s not a restricted npm name. After the installation is complete, change into the newly created directory, then start the app with the npm start command in your terminal.
Let’s clean up (optional) our app a little bit. In the src directory of the app, delete the following files:
App.test.jslogo.svgsetupTests.js
We deleted these files because they aren’t relevant to us in our build. We can also delete the reportWebVitals file. Doing that requires that we also remove the import statement and the function call of reportWebVitals from the index.js file for our React app to compile successfully. Again, this is all optional, so you can just skip this if you prefer.
Now, clean up the App.js file so that it looks like this:
// src/App.js
import './App.css';

function App() {
  return (

  );
}

export default App;
Creating a contact form component
In the src directory of our React app, create a Form.js file and add the following lines of code to it:
// src/Form.js
import './form.css'

export default function Form() {
  return (
    <form
      method='POST'
      name='contactform'
      className='contactForm'>

      <input
        type='text'
        name='name'
        placeholder='Enter your name' />

      <input
        type='email'
        name='email'
        placeholder='Enter your email' />

      <textarea
        name='message'
        placeholder='Messaage'></textarea>

      <button type='submit'>Submit</button>

    </form>
  )
}
Here, we have a stateless React form. Now, go to the App.js file in the src directory and render the form. The App.js file should look like this:
import './App.css';
import Form from './Form'

function App() {
  return (
    <Form />
  );
}
export default App;
Styling the form component with plain CSS
In the src directory, create a form.css file and add the following style:
// src/form.css
.contactForm{
  padding: 10px;
  width: 90%;
  max-width: 400px;
  margin: 30px auto;
  border-radius: 10px;
  display: flex;
  flex-direction: column;
  gap: 20px;
}
.contactForm input, button, textarea{
  height: 50px;
  padding-left: 5px;
  font-size: 18px;
}
.contactForm textarea{
  height: 100px;
}
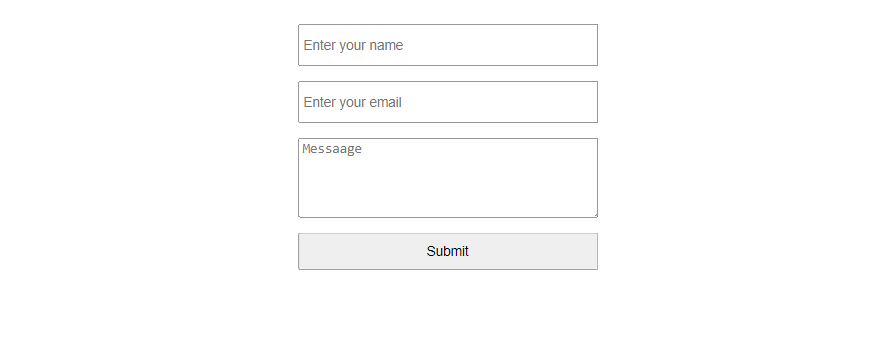
There’s no need to write any fancy CSS, but you can add some tweaks if you wish. With the styles we’ve added, our HTML form now looks like the image below.
To see the result, you’ll need to change into the netlify_forms_app folder and start the server:
cd netlify_forms_app
npm start
A browser will open up and you can view the result at http://localhost:3000.
Form Handling with a Stateless React Contact Form
A perfect example of a stateless React form is the one we created earlier. In this form, our input values aren’t controlled by the state. In this section, we’ll learn how to add a contact form to a stateless React app with Netlify Forms.
Adding a static HTML version of the form
The first step to enabling our form to work with Netlify Forms is to add a static HTML version of our form to the index.html file in the public directory of our React app. Why do we need to add this form? Adding this HTML form will help Netlify detect our JSX form, since the post-process bots can only parse HTML.
For this example, we’ll add this HTML form right after the opening the <body> tag in our index.html file:
<!-- public/index.html -->
<form name='contactForm' netlify hidden>
  <input type='text' name='name' />
  <input type='email' name='email' />
  <textarea name='message'></textarea>
</form>
There are two attributes to note in this form: name and netlify. The name attribute will enable Netlify to connect with our JSX form, while the netlify attribute will enable Nelify’s bot to be able to parse our form. We also used the hidden attribute to hide the form from our users. There’s no need to add labels or a submit button to this form, since it’s hidden from our site.
Add a hidden input element to the JSX form
In the Form.js file in the src directory, add a hidden input element with the name attribute set to form-name and the value attribute equal to the name of the HTML version of our form. These attributes are required to make our form work with Netlify Forms:
// src/Form.js
<input
  type='hidden'
  name='form-name'
  value='contactForm' />
The final version of our form now looks like this:
// src/Form.js
<form
  method='POST'
  name='contactform'
  className='contactForm'>

  <input
    type='hidden'
    name='form-name'
    value='contactForm' />

  <input
    type='text'
    name='name'
    placeholder='Enter your name' />

  <input
    type='email'
    name='email'
    placeholder='Enter your email' />

  <textarea
    name='message'
    placeholder='Messaage'></textarea>

  <button type='submit'>Submit</button>
</form>
There’s one more step required for this form to start working: deploying our React app to Netlify. We’ll cover this in the next section.
Deploying to Netlify
We can deploy our site to Netlify using a version control system like GitHub, or we can use the drag-and-drop method, which requires us to transfer the build file created from running the npm run build command to Netlify drag and drop page. Both methods of deployment will be covered in the following sections, but for this tutorial, we’re going to use GitHub for deployment.
Deploy with GitHub
Deploying our React app from GitHub will set us up for continuous deployment, meaning changes made to our repository will automatically trigger re-deployment of our site, which is an advantage over using the drag-and-drop method.
To be able to deploy from GitHub, we have to first make our React app available on it. Go over to GitHub and create a new repository.

For this tutorial, we’ll name the repository “NelifyForms”. Now at the bottom of the page, click the Create Repository button and we’ll be redirected to the newly created repository page.
Right now, this repository is empty. That’s because we haven’t pushed our React app to it. To do that, enter the following commands in the terminal:
$ git add *
$ git commit -m 'netlify forms with stateless form'
$ git remote add origin <Your_repoistory's_url>
$ git push -u origin master
These commands will create a new commit, connect us to our GitHub repository, and finally push our React app over to it.
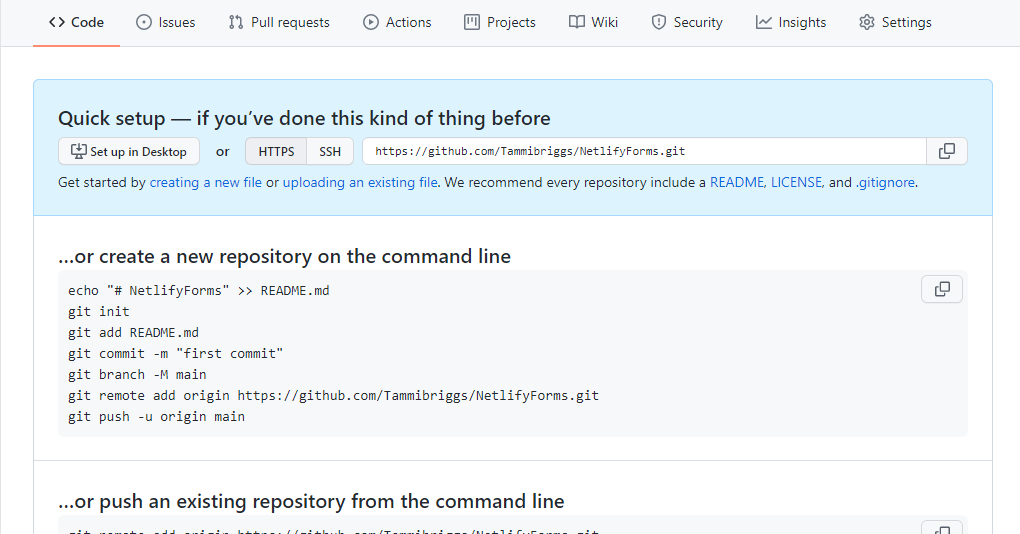
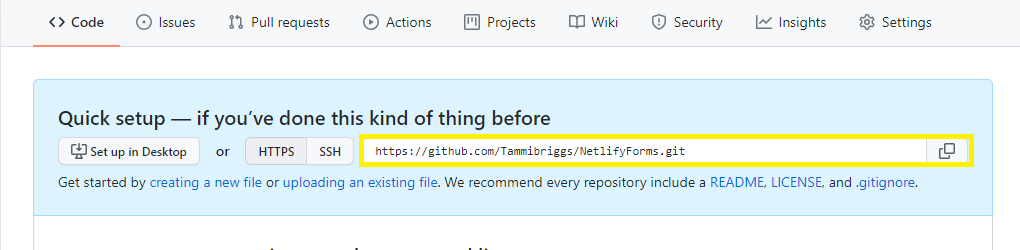
Make sure to replace with the URL of the newly created GitHub repository. Here’s an image that shows where to find the URL of the newly created repository.
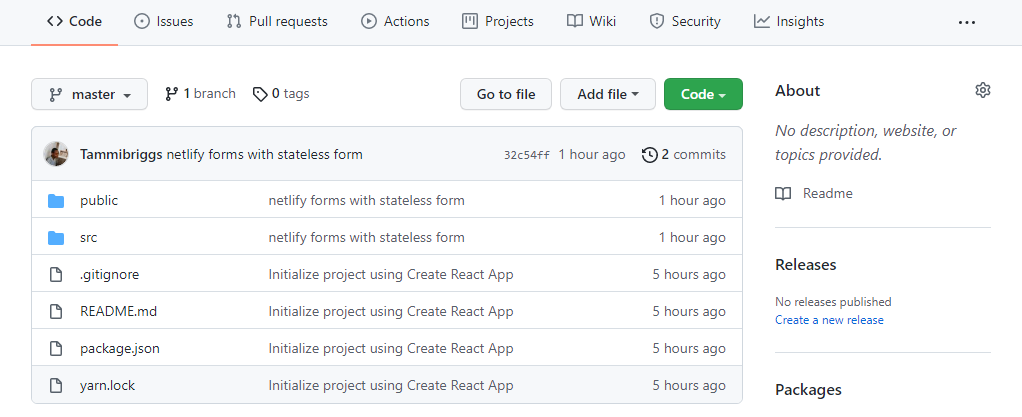
After running the above git commands, refresh the browser. You’ll find that our React app has been pushed to GitHub.
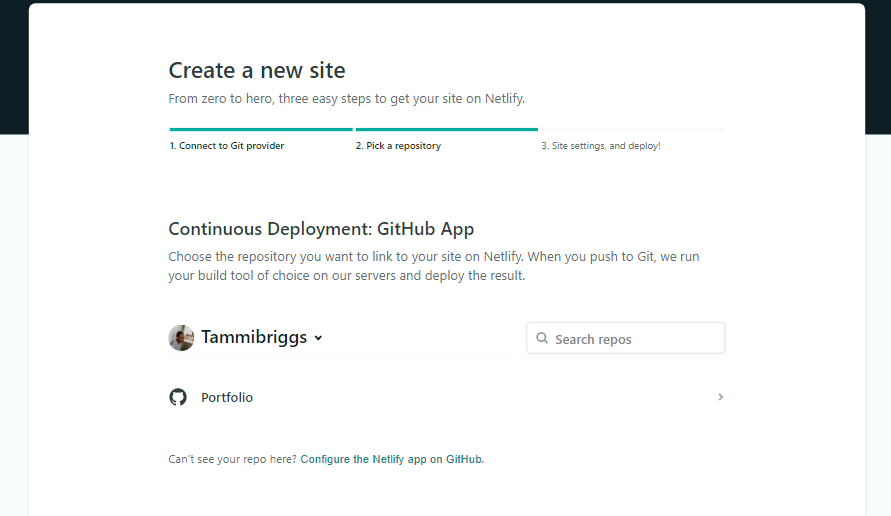
Now that our React app is available on GitHub, it’s time that we deployed it on Netlify. Log in to your Netlify account, go over to the dashboard, and click on the New site from Git button. We’ll be taken to the Create a new site page.

Click on the GitHub button under the Continuous Deployment section. We’re then redirected to an authorization page where Netlify will ask for access to GitHub. After giving Netlify access, we’ll see a page like the one shown below.
Right now, the NetlifyForms repository we created earlier is not displaying among the list of repositories, because we haven’t configured Netlify to access it yet.
To do that, click on the Configure the Netlify app on GitHub link at the bottom of the page. We’ll see a page like the one shown below.
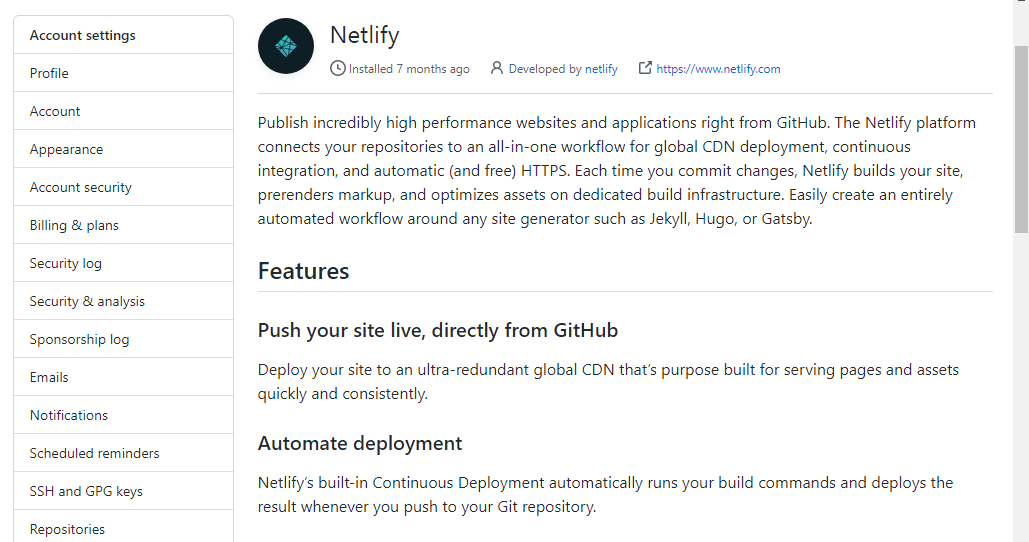
Scroll to the bottom of the page under the Repositories access section and click on the Select repositories button. We’ll see a list of our GitHub repositories.
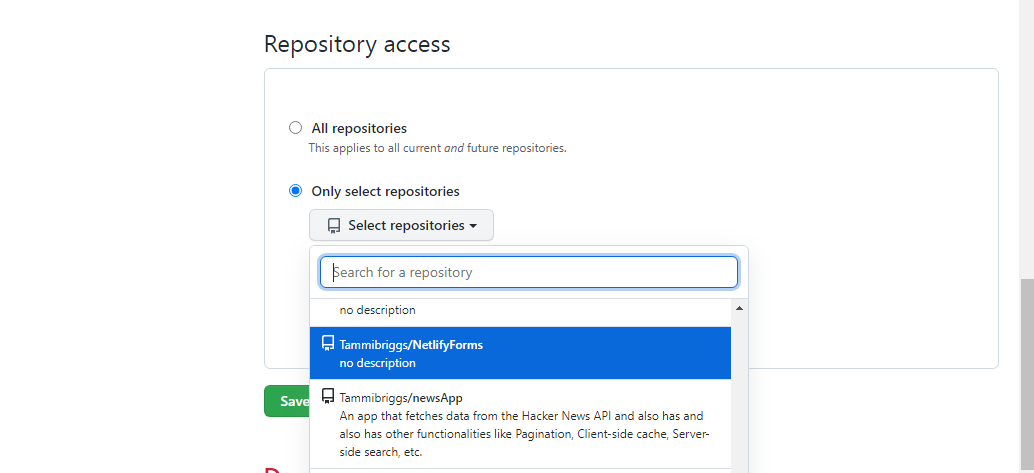
Select the NelifyForms repository and then click on save to give Netlify access to this repository. After saving it, we’ll be redirected to the Create a new site page on Netlify.
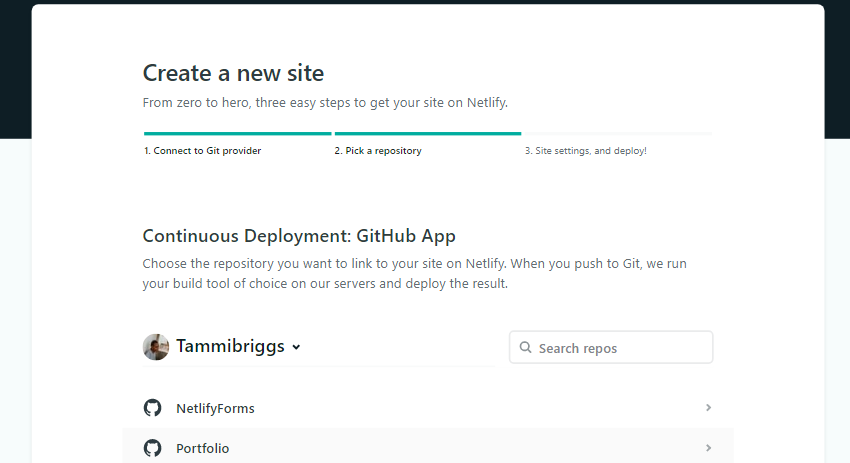
Our NetlifyForms repository is now displayed in the list. Click on it and we’ll see a page like this.
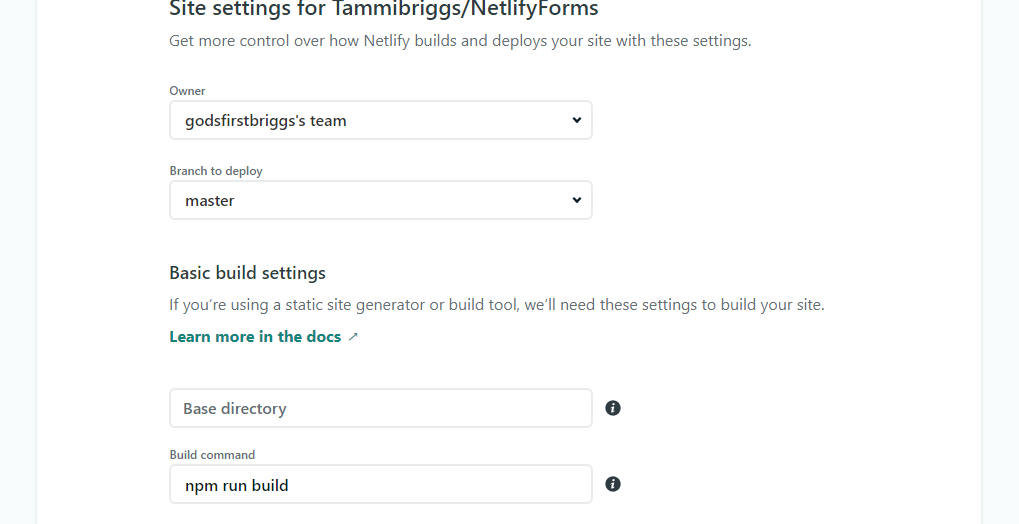
On this page, we can set the build and deployment options for our site, like changing the Git branch to deploy from, or the command to be used to deploy our site. But there will be no need for that, because everything looks good by default.
Finally, to deploy our site to Netlify, scroll to the bottom of the page and click on the Deploy site button. The deployment might take a while, but once it’s done we’ll see a link to our site at the top right corner of the site dashboard page.
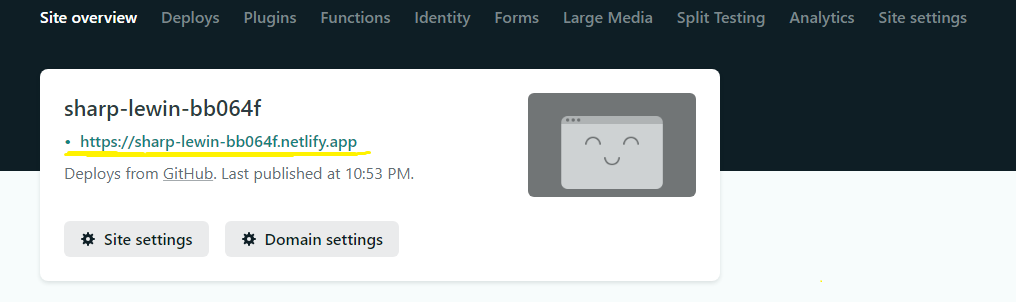
With this, our React app has been successfully deployed to Netlify from GitHub. When we click on the link, we’ll see the React form we built.
Continue reading
Add a Contact Form to a React App with Netlify Forms
on SitePoint.